Thursday, 25 June 2015

3d Report

In this post I will be discussing all the different applications of cinema 4d, which include the following, product design, animation, television, film, web and games, education and architectural walk through. I will be analysing each application in fine detail explaining all the ways that 3d modelling has its advantages in the media industry.


Games

I shall be starting with game design; gaming has massively improved over the last ten years making the mass appeal for newer games more wanted in the future.  Gaming has lasted for just over 60 years and it has progressed rapidly in graphics, memory space and value wise.  3d modelling hasn’t always played a part in the earliest of games due to the games being first made in 2d form so they are made in a 2d from graphically.  The lists of possible things that could be made in 3d modelling can be endless, it can be for something so little as a spoon and fork to a humongous fire breathing dragon.  The possibilities for 3d modelling can be endless; here are a list of possible 3d modelling objects and characters in recent games. The advantages of using 3d modelling in this application is that no matter how hard or extraordinary the idea of the game is you can make it playable or come to life in the game. For instance you could have something so random like a flying cooked turkey game and the designer would be able to make it possible, this grants the person endless possibilities which opens up the market for game designers and games.

  • ·      Characters
  • ·      Weapons
  • ·      Collectables
  • ·      World generation
  • ·      NPC (non playable character)
  • ·      Weathers
  • ·      Vehicles
  • ·      Level design
  • ·      World generation
  • ·      Animated
  • ·      Title screens
  • ·      Cut scenes


Websites 

Websites also use 3d modelling to either promote their business or to use it as a starting point to represent themselves, for instance if a website were to supply couches all from and across Britain, they could use 3d modelling to either express what they are doing or to use it show the people what the company stands for, they could make two men carrying a cough across a hallway and then text could come up showing their name, this is great and gives off a great effect showing professionalism and make the video user friendly to everyone.  Logos are the most commonly used out of this application, the possibilities are endless leaving the owner of the company with endless ideas and it also makes his or hers company unique.


 Films

Films have a totally different use of modelling rather than the games 3d modelling, the games 3d modelling is for user interactive, in any game the user will have control over what happens or he can move the character granting the user access of playing a ‘god’ whereas in films the 3d model of something has already been set and the user cannot interact with the model. The film industry uses 3d models to bring out the emotions in people trying to make them relate more to the model rather than having a choice into what it says or does. 3d models in films are used to interact with characters within the film giving it a sense of realism making the two characters more realistic and more relatable to the audience. Game character that are not controllable are called “NPC’s” this is where you cannot decide the fate of one of your fellow marines, it is set in stone that he will die forty minutes into gaming, this works in the same way of filming however naturally you wouldn’t be able to find a fire breathing dragon that will cooperatively give up his time to come on set and film, so you need to physically design a dragon that interacts with the characters on set. Real life like things like dogs and cats can be padding with motion sensors to capture the actual motions of the pet, for instance in the new film lord of the rings the character ‘Gollum’ was captured and created by capturing the motions of the actual actor himself moving around then it was modelled on the computer to make him look more realistic.


Animation 

Animation is the next application I will be explaining, since the introduction of movies such as tory story and bugs life, the movie industries popularity for 3d modelling has risen in the last ten years, it appeals to any age range and grants the creators of these film access to endless ideas. Before 3d modelling became so popular the designs for all characters were hand drawn step by step making the progression slow and frustrating, however animation is still a slow process but it makes the frames per second more reluctant and more productive when working with.  


Television 
Next I will be talking about television and how the use of 3d modelling is applied, television likes to use a lot of animation to show emotions like love and rage towards another character, they do this by capturing the film on a camera then processing the film then adding the 3d models later on giving the audience the feeling that it is happening in actual reality. Television also use a lot of 3d modelling for advertisement, they do this to make that advert more fun friendly towards the public as a for instance the recent advert for three g mobiling with the talking cat is used to promote and stand out from their rival companies. Here is a statement explaining on how they had made the cat “After developing a detailed 3D model of Bronte, MPC put a rig in place to set up the bone structure and muscle systems. In order to get a better understanding of how a kitten's anatomy works, MPC studied hairless Sphinx cats and also paid close attention to Bronte after bath time, as his wet fur made his anatomy much easier to study.” This shows all the work and effort needed to make the cat as realistic as possible, to develop and create an animal that is life like is so difficult as you will need to create the material for the cat, then design the real word physics around them, then create drawn out sketches of the animal itself to get a better concept of what you would want it to look like, then after it has been created you will need to make it compatible with the real with whatever situation and scenario your cat will be placed in.


Architectural  

Architectural modeling is considered the most useful and one of the easiest ways of expressing an idea, before any construction begins in for an actual building you have to draw out all the plans and dimensions of what your desired piece will eventually look like. After all the math’s is completed they map out visually what it will look like in 3d form, this will grant the architect access and will paint a picture in the persons head. After the building is up and created in 3d form then you will actually be able to see what the building looks like, if changes need to be made then it can be made and it can all be changed using the software. The advantage of this is that you wouldn’t have to physically build a mini version of the building by hand and waste time when you can create and recreate the building over and over again in the matter of minutes.


Educational 


My last application that I will be talking about is education and how we use 3d models to learn and to educate in different scenarios, we use 3d models in education without even realising, those textbooks in your science class that had pictures of cells where made on a computer to express what cells look like.  Digital 3D geological models allow students to visualise and interrogate geology giving them a better perception into what they are leaning about. We also use 3d graphs to show statistics and to hold data, we also map out our own galaxy to get a better understanding of where certain planets are around the galaxy.


Sunday, 21 June 2015

Proposal


Working title:
The working title for my game will be ‘Super Smash Bros/ Remastered’ I want this game to strike the audience as a shock because this game was so popular when the original came out and now there will be another game that has all new graphics and characters to play as.

Models:
    Mario - he is the pinnacle character that represents all nintendo games, the fun and colourful shapes that make up Mario will be a challenge but yet a fun experience. Because Mario is circular and has no sharp edges the character will be simplistic and quite easy to produce.  I make it a tradition to always play as Mario first in a Smash Bros. game. Well, at least every official Smash game. He’s an all-around character that doesn’t have much remotely special about him. However, he does have a recovery move that can be very effective if you manage to hit someone with it. Overall he’s a good character for beginners.

    Kirby – my second character will be Kirby, his popularity grew in the early 2000’s his popularity grew that much that the company brought out his own game. I believe Kirby is the perfect all rounded character for every member of the family; he can take massive amounts of damage and can deal blows that can knock players out of the map. He has his own special unique ability that can suck characters into his mouth and gain their special powers which makes Kirby a worthy foe to play against.

    Pikachu – the third character will be Pikachu and his own name speaks for himself, he was part of the greatest franchise in the history of games and cartoons, he was involved in the series Pokémon which rapidly broke records all around the world making him the perfect candidate for my game. His character is really tough and offers out massive amounts of damage to opponents, he will appeal mostly to the younger generation and the retro gamers; he will be used as my unique selling point to attract the eyes of my preferred targeted audience.

    Toad – I have chosen toad because I believe that originally needs to be added to my game and the characters that I have already chosen to add where in the original game, also I thought it would be a great idea to bring toad into the fight to shock the audiences that toad isn’t just a cute character. I will be making toad into a fighting machine that can deal out humongous amounts of damage proving that toad isn’t going to be a character to be messed with.  


Target audience:

My target audience for my 3d project will be people from the ages of six onwards, I want to bring excitement and joy to my audience, however with super smash boys they're isn't a specific target audience due to the mass marketing appeal that will catch the eyes of every member of a family, from the toddlers to the teenagers and then even to the more mature adults. this game will appeal to every age range because of its retro design and its sleek new graphics, the retro appeal will catch the eyes of the old gamers that grew up wit the old Nintendo 64 which the original super smash bros was released on, this brings in the old market and converts it with a the new market of audiences such as the younger generation that have grown up with their favorite television shows now being made into a game that they can play with and control their characters. I am hoping to make a family friendly game that is competitive and fun for all ages, I want to create a game that stands out from other platform games and brings out the inner child in the older generation and makes kids want to laugh when they turn on their Nintendo.


Application:

The application that I am going to be using my advertising technique to sell my game across the world, this will be used on Nintendo wii and will be available in every country. I will be creating my own characters and adding new power ups and even new levels to play on to try and be unique towards the first game so it isn’t a total copy.


Visual style:

The style that I will be adapting to when creating my game will be colourful and bright, it will be a fighting game where bright colours will be used to insinuate that the game is still made for the younger generation, i want my game to be bright and energetic because I want it to appeal to the new market of people as well as the old and I believe that if the game is child friendly parents will be more likely to let their child play the game. I want it to be a happy and friendly game even though it’s a competitive platform game. The characters will always be smiling when they are in stance mode or when the game is paused, when they are fighting small sparks will appear when the characters are hit, this will be to show the kids that the characters are not being physically harmed and that the children cannot see the actual damage that one punch does to the face.


Legal and ethical issues:

I have to take into consideration that my game will be copying the same idea as the original, however my proposal is to work besides Nintendo in re- releasing his old school classic game and to bring back the game in a whole new action packed game.  I will need to get permission from each of the characters original owners to make sure that I’m not crossing any legal issues with companies.


Stimulus:

The software that I will be using for the creation of this project will be cinema 4d, I believe this is the perfect software to start off any models an the game is due to its basic concept and visual arts of how easy it is to understand and learn all the different aspects of the software. I believe once the basic principles of the software is officially learnt you can test your abilities on harder characters, for instance I will be starting off on my ‘rounded’ characters first such as Kirby to understand how the materials work and how to start up primitive shapes to form characters. After I have understood the software I will be starting to try harder characters like Mario and Pikachu that take a lot more skill and persistency to create.


Key visuals and constraints:

My advert will solely be relying on the appeal of my characters and how it will have a shock effect that a forgotten game has been recreated and turned into a next generation game. The key to my game will be how it shocks the audience, I will do this by showing short clips of my game being advertised then a voice over stating that “your favorite game… reborn” this will intrigue the people at home into what game it is then right at the end of the advert it will show the title of my game ‘SUPER SMASH BROS/REMASTERED’ at the start of my advert I will be showing the old gameplay and how its changed over the last ten years, to then and to how its changed now in its all new high definition look.


Legal and ethical considerations:

The legal codes that I have to take into consideration is that this game has already been created and due to copyright infringement I have to be careful what I put in my game and what is possible and what isn’t. I have to make sure that my ideas are fresh and that my intentions are purely to resurrect an old game and are not to take any credit away from Nintendo themselves. 

Tuesday, 5 May 2015

Kirby character


I have chosen to analyse and show you the process of all my characters thought this entire blog, in this particular posts i have chosen to show you how i created the character 'kirby'. however i won't be showing you with the images step by step i will be explaining textually due to on my recent blog 'Mario character' i have shown you all the basic principles and needs to creating the basic shapes of any character such as his shape and sizes, in this blog i will be explaining how i created the colours of kirby and how i materialised him using the materials i have on photoshop. the character kirby was an idea from the original game, i saw this as an opportunity to use him as an "original selling point" due to his retro format and likeliness towards old school gamers, kirby was originally used to capture the eyes of the younger generation ages between five and 12 because of the shear adorableness and friendliness his image has.  creating this character was quite easy because of his basic shape, because of kirby shape and size i started creating him with a the primitive shape "circle" this was to be his body, i had to resize his whole body because the default shape that cinema 4d provided was too large also kirby's shape isn't perfectly circular it has shaped like a sphere so the middle of the circle is slightly squeezed.


Next i will be showing you how i created the material for kirby character:


I started off by getting the face i wanted on google, the background surrounding the face didn't really matter because i would be taking off the background later so only the eyes and the mouth will be left.
I first placed the image onto a blank background on photoshop, when doing so i had to make sure the picture was editable, you click the image twice which will bring up a small tab. if you click 'okay' photoshop will list the picture as a layer which will place the image on top of the white background.


After making the image into a layer it was time to get ride of kirby undated face. because on cinema 4d the material has to be flat i cannot just get kirby face from google still attached to his body because all i want is his face and not an image of his arms and legs. first i sleeted the magic pen tool on the tab on the left hand side, this tool selects different colour pixels in the image and lists them as a group, i would suggest using this tool on basic coloured characters like kirby because his primary colour all over is pink and the tool selects the pixels quite well. when the tool is selected it tries to select certain pixels but not all of them, however on a mac if you hold down the common button and hold the shift key a little plus symbol will appear and if you click more of the image the tool will select the bits it missed out.
when the pixels are selected you have to click the backspace button or the (delete) button to clear the pixels off your screen. after i deleted the the unwanted shapes and colours off the screen i was left with the mouth and eyes but it was left on a black background so i selected the paint bucket tool and coloured the background layer in.


When the material was created i saved it as a jpeg, this works well with cinema 4d because if i would have used the photoshop format it would of tried to save the layers individually onto cinema 4d. Once the format was correctly selected and the image was on cinema 4d  simply dragged the material over to my kirby and it had placed it onto my body.

Once my characters body was finished i could start on the feet and his fins, creating his feet i simply created another primitive shape using again the sphere but in the tool bar when the shape is first created it provides you will a range of shapes to pick from, once the shape had been i used the face selector and selected the bottom of the shape then deleted them, this created half a circle. I scrolled up to the top of the page and hovered over tools and selected the "gap filler" when this tool was selected if you hover over something with a missing face it highlights orange and if you click it it fills in the missing page. when the basic shape was created i dragged the title of the shape into a higher nervb which made the whole object smooth around the edges, I dragged the red material in onto the object then duplicated the object by holding down "command, 'C' " then holding down "command, V " to create a pair of feet. when creating the fins on kirby the same rules and principles applied i followed the same step by steps but in this case instead of deleting certain faces i just resized the image to make the base of the shape narrow to give it a fin affect.


Monday, 4 May 2015

mind map

                     Here is just a quick mind map of what i will be achieving and trying to create.

In this mind map i ave included the following; 
  • Background - What platform will my characters stand on
  • Game itself - My characters and scenery 
  • Audience - Young and old school fans 
  • Extras - Health bars, props and power up

Sketches of my characters

in this post i will be showing you my characters in drawn form, this is to gather more of an understanding of what  want my characters to look like and how i will express them in cinema 4d.


Sketches are great for any project because it gives you more of a understanding and concept on to what you want rather than creating something at the top of your head. 

Thursday, 30 April 2015

Pikachu


in this post i will be talking about how i created the unique pikachu, just above this text is the character pikachu that i will be basing it on. i have chosen to do research on both 2d and 3d characters to get a better understanding on how the character looks, also i wanted to choose the best emotion for pikachu so i picked the top common facial expressions and used them for my project.
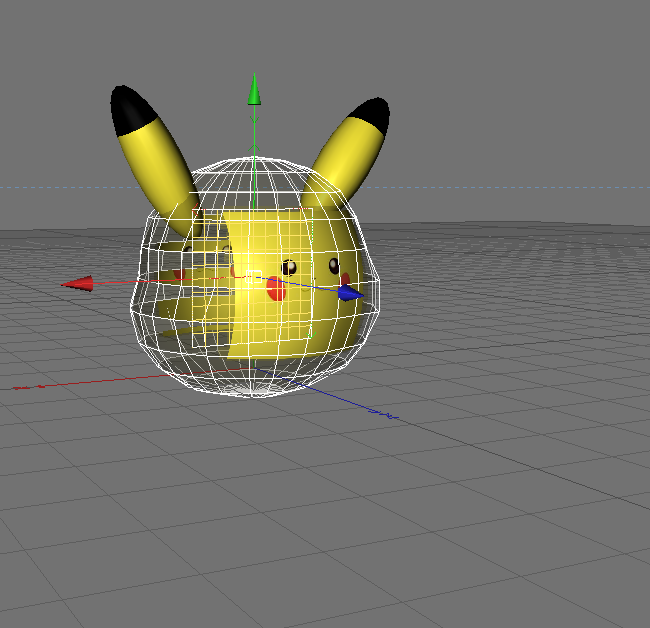
to start any project off you need to start with the basics so i had to start with a null object which is a blank basic object which could be a prism, circle or rectangle etc. in this case i am using a sphere, in the bottom right corner it gives you options on how to customise your sphere changing the shape and its attributes. one key technique i use is by changing how many faces you can have on the shape making it easier in some ways to edit for instance if you wanted a shape with only four editable faces on one side of the shape you can change it in attributes therefore making it easier for you to edit. in this case because of pikachu's basic shape all i had to do was use the the default sphere due it granting me all the faces i need.

to access these key features all you have to click on is the  object box just like the one you see above, you will see just below everything object properties and this will give you how many segments you wanted which would change the amount of faces i would have on the sphere or you could change the object type by clicking simply the 'type' link which will give you a list of names that will change the object so you don't have to change the segments. 
now to start editing any object you have to make sure its 'editable' in this case its located in the top left corner, you have to make sure the object is selected first that will highlight all the tools on the left hand side. the one you want to click will be the image with two circles facing each other. once clicked it will show up grey this means that your object is now editable. making an object editable grants you access to stretching the image, cutting certain layers on the image and pulling the segments individually etc. if you need to curve the image its much easier to use the magnet tool, you can access the magnet tool by clicking the structure tab at the top of the screen this will show you a menu of tools to choose from or you could use the shortcut key 'M-I'
once you've clicked the magnet tool it will come up on your screen looking like this, the centre of the tool will focus on points of your null object. for instance each face or segment has four points surrounding it in each corner so the magnet tool will focus one what corner yo want to drag out. in my case i need to create cheeks for my character, so i need to focus on two places on my sphere.
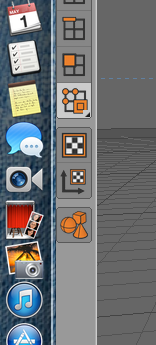
to make my image smooth i used a hyper nerb to smooth my object out, you can locate the hyper nerbs by clicking the third box straight above my image it also looks like a cube with wire surrounding it. by clicking the box it then sends it to your column on the right, to make your image smooth all i had to do was drag my sphere into the hypernurb which makes my image rounded and smooth. 
the next thing i did when i had created my basic shape of the head was create the material that i want on my image, to get this image i collect an image off google of pikachu's face and graphically redesigned his face to match my character. i used photoshop as my software and to do this i cut my background out and filled in his face with the same colour as pikachus face which was a dirty yellow. i had to save it as a jpeg and then all i had to do was drag my material onto my object.

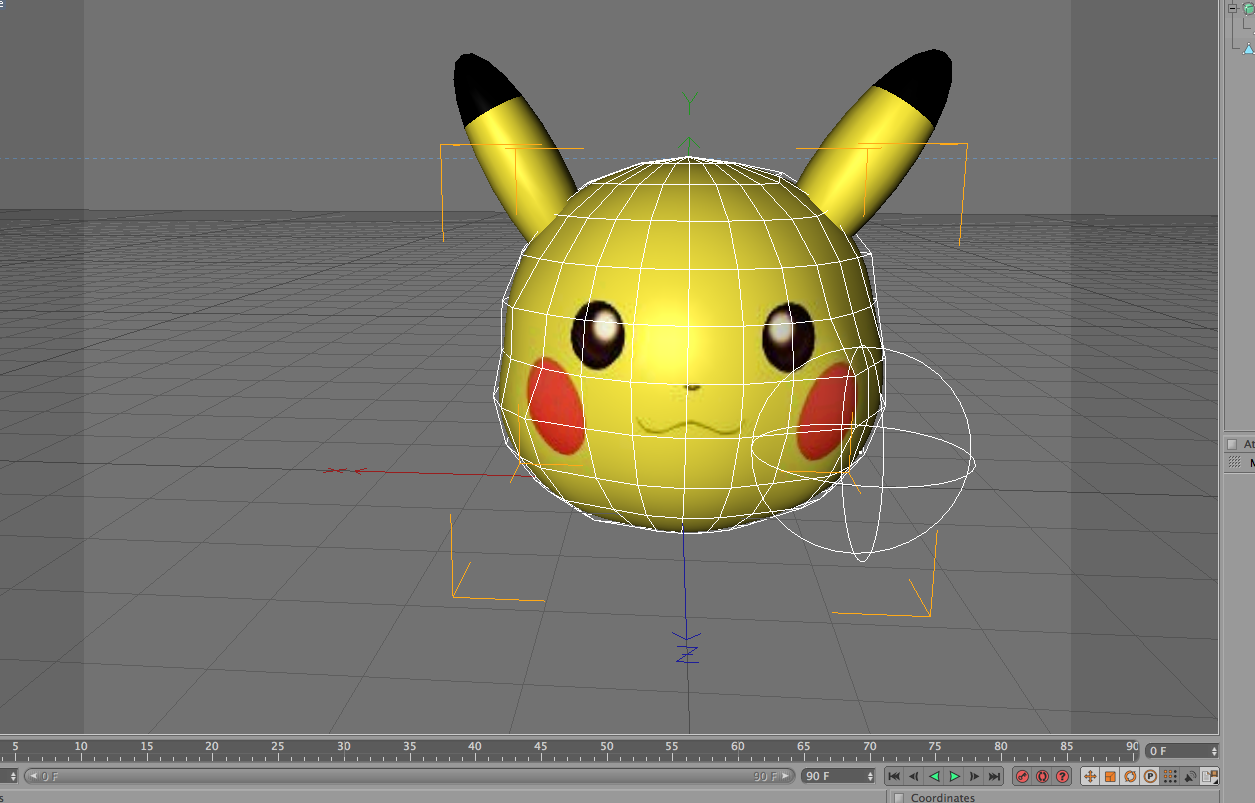
when i first dragged my materials onto my object it came up like this, it tried to over stretch my material by covering my whole object back and front which would have been okay if the image was blank but my image wasn't blank it had decals on it which was pikachus face, i had to decide which was my best option in trying to change the position of my material.  


after trying all the different settings out on the list i came across 'flat' which would help me in changing my materials position properly, you have to keep in my mind also that if you don't want the image to be copied and reproduced all over your object then you have to click off the tiling effect located just below the list of projections. if you did apply he tiles to your image it would copy your image over and over again filling your object with pictures of the same object. another technique to bear in mind when clicking the projection 'flat' is that just below the projection there is a tab called 'side' this tool places the image on the side you desire. you can choose from front, back an both. in my case all i wanted was the front of my object to show pikachus face so i chose to front.


In these images above it shows what my image will look like after choosing all the settings on my attributes, now before i can manually move my material i can only move my object as a whole so i needed to move my material so it will be in position and and match the actual pikachu. to manually move the image you have to click the button on the bottom left corner, it looks like a checkered board with and arrow pointing upwards and right. this will allow you to only move your material instead of the image as a whole. with my material it was trial and error trying to find out how to fit my pikachu face onto my image, for example i first started with pikachus face it was quite large and when i placed to onto my object it didn't quite fit due to the rest of the image having to be coloured in yellow too so i had to make the face smaller and the background lager, this was so the back of the head on pikachu was covered and the face didn't look distorted.

To create my ears i used the same techniques as the ones above, except i used rounded cylinders instead of spheres , and just created a simple material in photoshop and adding it to my cinema 4d. after the material was placed i found it more easy to get a concept of how round his face was so i went back to the magnet tool and rounded off certain edges and brought out parts to emphasise his cheeks.


to create these extras i used the same techniques as i used in creating the head, however in this case i used a different material but the same colour, i used the same program (photoshop) in doing so i already had the colour i needed to create a base for my tail, my ear and my feet. because of pikachu's simplicity when creating these objects it was fairly straight forward. i used one null object to create the tail which was the rectangle object. i flattened the rectangle and pulled the y axis of the rectangle to move it up and then copied and pasted the object so the width of the object would stay the same. when moving the object i always dragged the rectangle by using the arrows and never manually moving it. this way my shape would stay aligned with each other and not look obscure side by side making the objects look connected. after my tail had the basic shape of pikachu's tail i just dragged the material i created onto my tail painting the whole thing yellow. for pikachu's feet i created a sphere object and used the magnet tool to shrink it down to size, one key technique i used was by selecting the centre of the sphere and bringing the y axis towards the top then selecting the only the bottom segments of the sphere then dragging them towards the top. this technique grants you the capability of rounding the bottom half off and creating a circular based foot. for the ear i used the technique called "set selection" this is when you want to create different colours or set different materials onto one object. i fist began with a sphere then stretched it to create the shape that i desire, then i used set selection to create the top half being black then the bottom half being a dirty yellow.

last but not least i had to create a body for my character, this was the most time consuming bit due to trying to match the length of the actual pikachu himself. trying to keep his head in proportion to his body was the hardest bit because i didn't want his head looking too large and overgrown for his body so it took me more time to match his characteristics. when creating this body i used a square then magnetised it down then hyprnerved it keeping the image rounded and circular. after i had created the body i dragged the material over to it and then placed it in with my head.


this was my final piece finally created, i enjoyed this character due to it being him being in my favourite cartoon as a kid. i am pleased mostly with how his face has turned out, because i used the original face from the character i believe it has helped me capture the realism of pikachu. 

Mushroom character

to start my toad off i simply added the sphere to my cinema 4d by using the primitive shapes in the top right corner, toads actual face in any series is quite simplistic in its 3d form causing the base of his face to be completely spherical.

Using photoshop to create my material i simply placed the jpg onto my cinema 4d then i simply placed the material onto my sphere which  covered the whole of my sphere, but first i had to change the setting of my sphere and had to set it to flat, which therefore covered the whole of my sphere, then i had to select what side i wanted my material to be seen on, so i selected 'both'. just underneath i there is boxes that can be sleeted and ticked off but in this case i didn't have to select them due to i didn't want my material to be tiled or mixed.


the second part to toads head was quite simply again due to the second part of head being spherical as well as the first. i followed the same steps by using the sphere but i had to place the sphere correctly into position.  
I had found the correct material online using google as my main search engine, thought the making of  my the cinema 4d project i had used 'google' to find all my materials.
When i had first placed the head onto the other head it was a little too big so i simply selected the resize tool on the top left of the screen and had resized it down proportionally so it matched the original toad. 


Creating the body wasn't the hardest part of the toad, it was creating the material to fit his body, at first i tried to create one using photoshop but trying to find and fit one correctly to the scale on my toad was improbable, i had learnt a new technique called "select selection" this is where you can select certain faces of any object and place specific materials on them without affecting the rest of the body, once sleeted the faces will light up, you can locate this tool by overing your mouse on the "selection" tool at the top of the screen then clicking "set selection" once the button is clicked it will highlight and you will see next to where you name your object another icon will appear this will be your selected part of the object, you can rename the set selection to make it easier so you don't forget which is which, once i had completed naming the parts of the body i simply clicked the named part and dragged the material i desired onto the body.

I needed my body to look realistic and more comparable to the actual toad in the original game, i did this by minimising the cinema 4d to half of my page then selecting google and using the other half to show me a picture of toad, so my screen was half cinema 4d and half a picture of toad. I also had to get my colours right so this was quite a good technique because the comparison between the two colours where quite easy to locate once i had something to compare both too.


Here is an image of the finished body, once rendered the quality of the colours will look smooth, sharp and not pixilated.


After completing the head and my body all i had left was the feet on my character, i had created two spheres then deleted the bottom half of my heres then used the face filler tool to create the platform for the base of my show, then i simply dragged both objects into a nurb making them smooth so ind the render the stretch marks on the shoe wouldn't show up. 


here is my final character completed and rendered, i am really pleased with the way this character has turned out and am quite happy with how comparable these characters are, once rendered the characters are sharp and look realistic, toad was my fist character i had created and i used the techniques used here as a learning curve for my other characters, the techniques used in creating toad were simplistic and basic but are really helpful when i started created to create the other characters.